Showing posts with label metal work. Show all posts

Sunday, March 9, 2014

My Classes have Begun!


A beautiful hibiscus I planted in our back yard last spring -
it's already over 5 feet tall!
 
So...the call of vacation and home renovations have entirely captured my attention for the last several weeks.  I've thought about blogging but just haven't. There. I admit it [that's the first step isn't it?] :)  I do have dozens of photographs of the work we've done on the house, the garden, sunsets, beach days, our tropical kitty, our home kitty, my metalworking class adventures, other craft projects and the beginning of my collection of jeweler's tools and supplies for my workbench here (come on, we knew this was inevitable!). Stay tuned!
 
My classes started a couple of weeks ago...I love the art college here and they have a fantastic, fully equipped studio.  Some of the tools and techniques covered include riveting, texturing and imprinting metal and wire using hammers and a rolling mill (this is an amazing piece of equipment!), tube setting stones, and improving and expanding soldering techniques to name several. I've spent some time sketching ideas for earrings and am presently experimenting with sweat soldering and pic soldering with MUCH practice required! Soldering can seem straightforward but it's a tricky business [for me, anyway :)].  I've melted more metal than I care to admit to!
 
A few design sketches and the main shapes for a pair earrings from
copper sheet.
I've hammered the little rounded pennant shapes and filed the edges smooth.  I've made little 'branches' from 14gauge brass wire and hammered them lightly as well.  The plan was to saw leaves and flowers to add to the pennant but time was a factor so I made some simple spirals from sterling silver wire and copper links for the ear wires.  And now the assembly begins!
 
Ready to solder pieces together - 'branches' first and into the pickle!
 
I'll be back with finished photos (assuming I don't ruin them!) when they are done.
It's good to be back!


Thursday, April 18, 2013

My New Favorite Stone...

is Larimar!  I was introduced to this beauty just this year when talking to a friend who had visited the Dominican Republic.  She had purchased a pair of handmade earrings made with larimar beads while on vacation.  The aqua color is amazing!
...and here is my finished ring!

Monday, April 15, 2013

Improving My Technique...

Handforged Sterling Hoops with Secure Clasp
 
 I have been primarily self-taught in my skills as a jewelry maker.  And while I have gained much experience and developed my own successful ways of 'doing things', I've really wanted to grow, improve and refine many of my techniques -- and maybe uncover and remedy some 'bad habits' at the same time. My last class at Hui was perfect for just that! Creating these simple sterling hoops refined my shaping and hammering skills and developed a new technique for creating a secure clasp to better hold the earring closed.  I also practiced using different tools for filing and polishing.
Stacking Bangles in Sterling, Copper and Brass
 Stacking bangle bracelets provided new opportunities in soldering - experimenting with brass and copper solder, firing temperatures, sanding, hammering and shaping were all part of the process and were valuable experience.  Plus, I have three pretty mixed metal bangles to wear! 
 
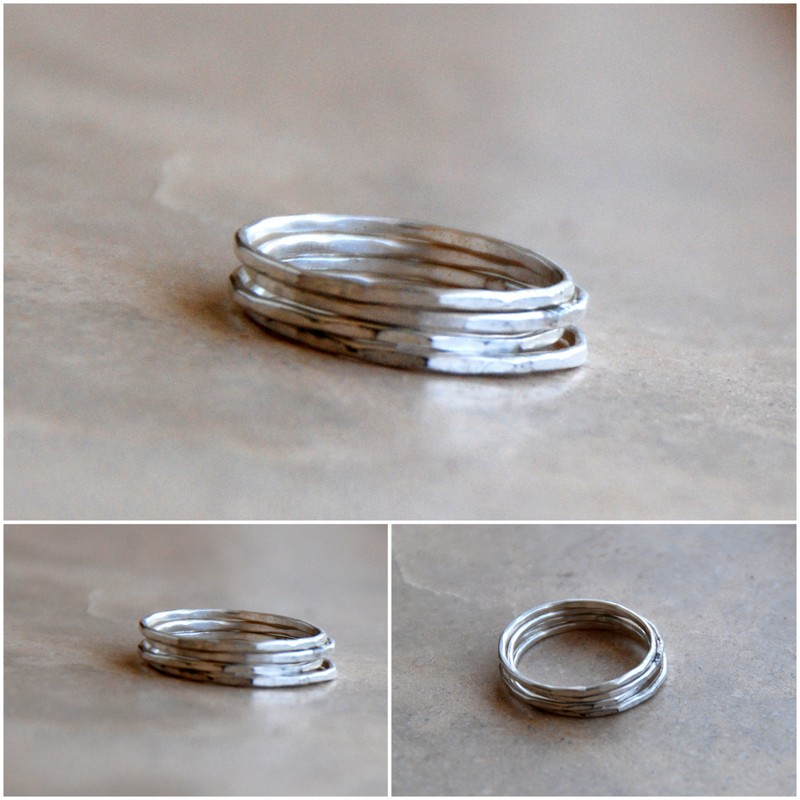
One of my favorite things to make is stacking rings - so cute and so fun to wear in a bunch! I learned a great deal more about ring sizing, making a set of  'templates' for each ring and bangle size and some fabulous production techniques. It was a great class!
 
Sterling Stacking Rings
Leaving the studio yesterday, I felt kinda sad.  I've met some really talented and wonderful people there in the last couple of months and will miss them and the comraderie of our groups.  I can't wait to return and sign up for more!

PS.  I also finished my larimar ring which I'll post later this week :)


Thursday, March 28, 2013

My Ring is Done!

...I was SO excited to go to class this week to finish my ring and set the stone.  The finishing included several rounds of sanding and polishing both the interior of the band, the setting and the rest of the ring. Next, I gave it three baths in liver of sulfur to add patina.  A good scrubbing with water, a bit of dishsoap and a brass brush brought out some pretty highlights.

After securing it in my ring clamp and gathering my bezel rocker and burnisher, I was ready to set the stone :).  I worked around the stone in several stages, slowly bringing the surrounding silver closer and closer until the stone was snug and then I burnished the edge of the setting to smooth it out.  A bit more sanding and polishing were required as I made a few little scratched in the silver and unfortunately, that also removed some of my patina on the setting itself. I'll know better next time! 

Even so, I like how it all turned out! Here is the finished ring which I am happily wearing today! I can't wait to make another :)   Stay tuned for some new silver earrings I plan to make at Open Studio this week...
 

Saturday, March 23, 2013

Open Studio - Ready to Polish and Set the Stone!

...so, I worked hard at Open Studio on Friday and my ring is ready for polishing and setting my stone! This collage shows the set up and soldering of the bezel to the baseplate -- this time my soldering went really well, flowing on my first attempt.  I'm beginning to see the correct state of the flux and know when the solder will flow.  A pickle bath cleaned everything up.

Next, I sawed the excess silver into my desired oval shape around the bezel, leaving a small lip as part of the design.  You can see my sawing skills need practice but I did get the basic shape and a good filing will smooth everything and refine the shape.  I've discovered I really like the filing stage and the control it gives me to create the vision I have in my imagination.  Plus, it's kind of soothing in that you have to take your time and be so deliberate in your purpose.


 You can see the baseplate nicely shaped using a fairly coarse metal file.  Next I prepared the ring band to attach to the setting by first filing a flat plane on the band, opposite the original soldering seam.  Sweat soldering the flat spot prepared to the attachment. I spent at least 10 minutes lining up the band and setting (the 'third hand' tool is MOST helpful!) -- I was very worried I'd solder it off-center or lopsided - but it was worth it.  I got it just where I wanted! yay!
Here you can see the attached pieces, its next pickle bath and the ring all cleaned up and ready for the stone.

...and the stone fits!!!!! 
 
(Please excuse the dental floss -- I wanted to be certain I could remove the stone to finish the ring! :)
 

Friday, March 22, 2013

~ New Designs...

... in the drawing/planning stage...
 I'm hoping I'll have some time in Open Studio next week to begin these new earrings in copper!

Thursday, March 21, 2013

Wednesday's Class - Creating a Bezel

This week we learned how to make a bezel setting for a stone (or other cabachon), a skill I've wanted to learn for ages! I also have a new appreciation for the time and attention required to get this just right :)   Originally, I intended to use a small larimar stone I have but decided set this larger lapis lazuli as it is about twice the size -- this seemed like a good idea for a beginner such as myself and I was right! :)  I chose my fine silver bezel wire and wrapped the stone to mark the length required.  I trimmed the seam for a snug fit to solder which is already completed in photo 3.  I struggled with the soldering of this seam, first causing it to flow right BESIDE the seam -- good grief.  My second attempt failed because I didn't have my torch temperature high enough which resulted in a second cleaning and a bit of a panic that the bezel would no longer fit the stone. Third time proved successful and you can see it still fit  -- YAY!

Next, I cut my base plate from 20 gauge sterling sheet metal and this is as far as I got in the process. At Open Studio on Friday, I'm going to finish the setting and solder it to the silver band I made earlier.  It will be ready to set the stone and finish at next Wednesday's class! I have a second ring band and that larimar stone I mentioned -- my goal is to have that ring also completed before the end of this course.  I've enjoyed it so much, I signed up for a second class later April :)  Stay tuned for the finished lapis ring next week...

Tuesday, March 19, 2013

Open Studio ~ Hammered Sterling Ring

Fridays are Open Studio time at Hui and I was excited to make another ring - this time a hammered band in sterling silver.  I took photos of the entire process (as far as I got :) this time and here they are!  1 and 2 - I cut and filed 18 gauge sterling silver sheet metal. Photos 3 to 5 show the texturing process with a hammer and anvil.
 I measured the length for my ring size and sawed the extra silver. Next, I annealed the metal with my torch to make it easy to work with and gave it a pickle bath to clean the fire scale from the silver. Shaping begins the preparation of the seam for soldering.
After quite a bit of filing and 'wiggling', I had a nice flat seam. A bit of flux and solder and I'm ready for the torch.  I LOVE this!! Another pickle bath and some shaping with a rawhide hammer and I'm ready for filing and finishing --

Here is the ring ready for some more filing and a bit more hammering to add more texture and increase the size a bit.  Next Friday, I plan to add a bezel set stone - probably lapis lazuli - and finish the ring by oxidizing and tumbling to reveal some highlights.  I'll keep you updated!
 
...on my way home!

Wednesday, February 8, 2012

well, I've pretty much torched off my fingerprints...

...filed my fingernails to a nub, knicked and poked holes all over my fingers and hands BUT I am having a blast! (hehehe...no pun intended!)


Thursday, September 22, 2011

New Rustic Hammered Hoops

...you know how much I love metal, especially rustic-distressed-organic-industrial metals. Wire is one of my favorite mediums to achieve this look and I've been playing with some new tools - particularly a mandrel and rawhide hammer that allow me to shape heavier gauge wire with ease. I've begun with some simple hoops using a piece of 16 gauge sterling I had on hand -- after filing and sanding one end to taper the wire, I shaped the circles using the mandrel and soft hammer - how fun! Hammering for texture and strength came next and then oxidizing and polishing for shine-- not bad for a beginner!